The Best Placement for Granite Countertop Seams

Granite offers a wide variety of practical benefits as well. First, granite is incredibly strong and durable, rating at about 6-7 on the Mohs Scale of Mineral Hardness. Granite is resistant to heat, scratching, etching, chipping, cracking, and other common forms of damage, especially when regularly sealed.
In addition, granite slabs can bring a wealth of visual drama to your interior design, thanks to intense depth and dimension, not to mention incredibly dynamic and eye-catching patterns. If you want a bold countertop material to serve as the showpiece of your kitchen, granite is where it’s at.
Of course, choosing a granite slab that’s right for your application is just the first step. Next, you have to consider logistical concerns, like how the fabricator will cut it to fit your countertop space. If you have a large or oddly-shaped countertop, this could mean cutting and placing multiple pieces, which has the potential to leave you with seams that break up the flow of the surface. While this is a common practice with countertop fabrication, knowing more about seam placement that can help you maximize the beauty of your stone.
How can you determine the best placement for granite countertop seams to minimize visual impact? Here are four considerations you need to know.
#1: Slab Sizes
The first thing you should know is that granite is cut into reasonably standard slab sizes when quarried. Generally speaking, slabs are roughly 45 square feet, with dimensions of about nine to ten feet in length and five to six feet in width.
If you’re just covering a kitchen island or a small kitchen countertop surface, you might be able to get the job done with one slab and therefore, no seams. However, many kitchen layouts will require your slab to be cut and pieced.
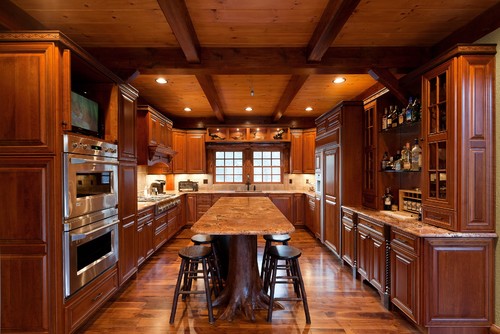
Consider this rustic Catskills kitchen, with an expansive floor plan featuring walnut flooring, cherry cabinets, and what looks to be Crema Bordeaux granite. A single slab could easily (and seamlessly) cover even this moderately large island. However, the extended perimeter countertops almost certainly have one seam and possibly even two.
#2; Do the Math to Minimize Seams
Slab sizes will vary slightly – after all, you’re dealing with natural stone. Once you have an idea of slab sizing, you can first measure your kitchen to determine the surface area you’ll need to cover. If you’re partnering with a full-service fabrication business, they will also accurately template the kitchen to let you know what to expect in terms of how many slabs will be needed and seams.
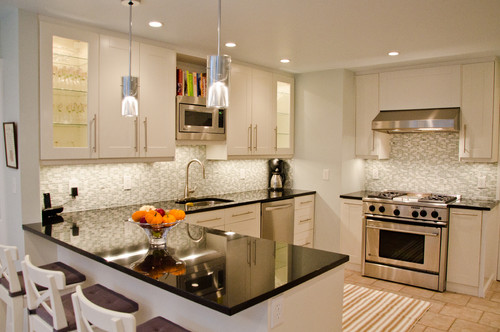 Let’s start by looking at an L-shaped counter, like the one in this transitional New York kitchen. The long-run is listed as eight feet, while the peninsula is six feet. With the right slab, you could cut the entire countertop surface in Absolute Black granite as a single piece.
However, you have to account for the fact that the standard counter depth is about 25 inches. If the peninsula extends six feet from the back wall of the long run, you might be fine, but if the six-foot length starts at the front-facing edge of the long run, you’ll need a seam somewhere. It’s also important to know that when you move to a U-shaped or oddly-shaped layout, it can get more complicated.
#3: Avoid the Sink and Under Countertop Appliances
You might think the natural place to hide a seam is on the edge of the sink. While seasoned installers may find ways to make it work, the truth is that the sink is an unsupported area, which makes it a weak spot.
When you add a break in the granite countertop that can further compromise the structure’s integrity, you risk problems like the seam separating later on. Don’t forget, the sink area also gets a lot of use and abuse, with heavy dishes and pots getting thrown in the mix. Seams should always be placed six or more inches from a sink cutout.
The sink may provide helpful visual camouflage for a seam in your granite countertop, but it’s not an ideal situation from a practical standpoint. You should also avoid placement above under-countertop appliances like a dishwasher, which would leave the weak seam unsupported (and put your device at risk of damage if things went south).
#4: The Best Seam Placement
The best place to situate a seam is somewhere it will get the least attention, so you’ll want to look for natural breaks. That is easy if you divide your countertop surface by appliances (stove, fridge, etc.), but what if you have a long, unbroken stretch, especially one that connects to a peninsula?
Ideally, you should place seams in well-supported areas, such as over a spot where two cabinet side walls meet. However, this could place a seam smack in the middle of a highly visible section of the surface. Often, seams are placed in corners, where less traffic and food prep occur.
In addition, you can largely hide seams by matching slab patterns as closely as possible and mixing pigments to practically make the epoxy invisible. Darker colors and intense patterns can also help to hide seams, so choose your granite wisely. With careful measurements, thoughtful slab choice, calculated placement, and skilled fabricators, you have the best chance to camouflage seams and create the appearance of an unbroken, elongated granite surface.
If you need help choosing the perfect granite slab for your kitchen upgrade, contact the qualified professionals at Academy Marble & Granite to request a free consultation today. Otherwise, you can simply visit one of our conveniently located showrooms in Bethel, CT, or Rye, NY.