How to Measure Countertops in 4 Easy Steps
Of course, conscientious homeowners want to know what the pricing might look like before committing to the investment, so one of the first things you need to know is your countertop dimensions, as pricing is based on the material cost per square foot. If you’re purchasing a pre-cut slab, this means taking accurate countertop measurements to get the best possible quote.
(Please note, when you partner with a professional countertop supplier, they will take digital measurements of your space to ensure exact dimensions; the measurements you take will be used for quoting purposes only.)
While professionals can certainly help to nail down precise measurements when it comes time to purchase a stone slab and install it, you can get a close estimate ahead of time. Here are a few easy steps to help you accurately measure the countertops in your home.
Step #1: Get Some Graph Paper
If you are simply requesting a quote or rough estimate, you do not need to make a detailed rendering as suggested in this step, you can move to step #2.
The place to start is with the right tools. You’re going to need a measuring tape, naturally, but you’ll find that the easiest way to get a clear idea of size and layout is with graph paper. You can typically find graph paper anywhere school supplies are sold. Use a pencil, just in case you make mistakes.
Creating a diagram will not only help to ensure accurate measurements, but if you do it right, it will display the angles and location of key items that help to determine precision sizing and the overall shape of your countertop. While your diagram doesn’t necessarily need to be to scale (as long as measurements are correct), this detail can give you a better perspective on what the finished product will look like.
If you’re not into drawing by hand, consider a floor planning or interior design app that does a lot of the work for you. Floor Planner has a free option, and you can sketch out your floor plan in 2D, complete with measurements, before seeing it in 3D. Planner 5D is another great option that starts with templates and allows you to customize.
Step #2: Measurement Mindset
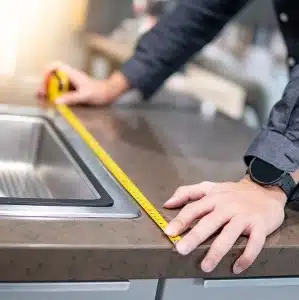
There are a couple of different ways to measure your countertops. The first option is to measure around the perimeter. This means measuring the longest sides (along the back wall/outside edges of counter surfaces), as well as the inner perimeter (the edge that overhangs cabinet fronts), and of course, the depth of the countertops (from the front edge to the back wall).
The second method consists of breaking up the surface into rectangles, as this is how slabs will most likely be cut. Essentially, you’ll measure the longest countertop section, from corner to corner, as a single rectangle. If you have an L-shaped countertop, you’ll then measure the adjoining countertop surface not from the corner, but from the front lip of the first side. For a U-shaped countertop, you’ll measure both arms coming off the bottom of the U in this manner.
As a layman, the first method will likely be the easiest for you, and you can simply let your installer figure out the details when it comes to purchasing and cutting the slabs. When you look at slabs, there’s a good chance the fabricator or seller can look at your diagram and tell you how many slabs you’d need for coverage.
If there are angles other than 90 degrees in your kitchen, the easiest way to measure them may be to fit a piece of paper into the angled corner and fold it to fit flush, then simply run a pencil along the angled corner. From there you can use a protractor to see what the angle is (again, you’ll find it where school supplies are sold).
Step #3: Measuring Cutaways
As you can see from looking at your kitchen or bathroom, countertops are not a completely unbroken surface. You surely have a sink cutout, at the very least, and your countertop surface may be interrupted by appliances like a stove and a fridge, as well. You must include these measurements because they represent breaks in your surface and they could affect the slab size needed, as well as cuts that must be made to the stone, which could all impact cost, for better or worse.
Step #4: Final Details
You’ve measured the perimeter of the counters and accounted for gaps and cutouts. You’re almost done! There’s one more thing you have to measure: overhang. Your countertop doesn’t end at the front of your cabinets – it extends beyond. You need to measure any overhang on your current countertop surface to subtract from dimensions and determine the actual depth of the cabinets.
This will be an important detail during countertop replacement, even if the new overhang is different from the old one. If you have a backsplash, which likely overlaps the countertop surface, you’ll also need to determine this depth to ensure accurate counter measurements.
Partner with a professional stone fabricator
When partnering with a professional, they take the measurement burden off your hands by completing digital measurements. Our template department will schedule a job site appointment to take digital measurements of your project area. The digital measuring method ensures the highest level of accuracy that’s not attainable from traditional methods. If you are interested in requesting a quote with Academy Marble & Granite, please click here.